How To Create a DIY Professional-Yet-Affordable Photoshoot.
Growing up, I’ve always secretly wanted to be a model. Even to this day, I really enjoy getting ready for a photoshoot and posing for photos. The real problem is I just don’t have the time, patience or the constant budget for a photographer to have around me all the time. But, as a businesswoman for my brand, I need updated, fun, confident and fresh photos on a regular basis. This would mean waiting around for several weeks or months for a photographer to complete a set of photos is not exactly ideal. So, here’s how I create my DIY affordable photoshoots:

Equipment:
• Camera- I’m quite a minimalist, so I’m not one for a super fancy camera. As long as you have a phone with a decent front camera, you don’t need an insanely priced camera. • You’ll also need 2m square fabric in any colour you like- white is preferred. However, tanned colours really compliment most complexions, or anything that matches your brand will work well.
• Lighting.
• Bluetooth remote shutter
• Tripod that holds your phone
• Makeup and skincare products- note- if you can obtain many different kinds of highlighters like powder, liquid, cream and spray- this will do you a world of favours.
• Outfits.
• Hair styling tools/ accessories.
• Editing apps- Photoshop express, Lensa, Lightleap or lightroom.
The Prep:
Here’s the thing, never “just start” a photoshoot; you need to prep for it. So, first things first, what’s the vibe of your photoshoot? What will you need the photos for? What colours are you going to use? What’s the storyline and background?
When you have a good idea of the purpose and overall look of what you’re trying to achieve, the next thing to do is prep your skin. I always say that good skin = less makeup = amazing photos. I used to be a makeup artist (and still a skincare enthusiast). I was always taught that you need “photographic makeup”, aka full coverage+ makeup like you’re wearing a mask to create stunning photos with flawless skin. This is simply untrue; you just need a great skincare routine and makeup in the right places.
Since everyone has different skin, my routine may not work for everyone- but here’s what I do so you can get an idea of how to prep:

1 week before photoshoot ~
Step 1- Extract blackheads using a loop tool and suction tool. Take extra care to not bruise yourself; otherwise, you’ll have to delay the shoot.
Step 2- Exfoliate with a gentle physical exfoliant, then rinse. Exfoliating with a physical exfoliant promotes collagen, so doing this daily is essential. I recommend only using gentle products - this means no walnut shell exfoliants. It doesn’t even have to be expensive. In fact, I’m using L’Oreal Paris Pure Clay Glow Scrub, which only costs £3.99, but it gets the job done so nicely.
Step 3- Cleanse. As a rule, I always cleanse after exfoliating. When you exfoliate, you remove dead cells. Sometimes, you might still have the leftover product on your skin, so cleansing afterwards will make a massive difference.
Step 4- Chemical exfoliant. I have used many chemical exfoliants, but the only one that actually makes any kind of a difference is Revolution’s Glycolic Acid 10%. This actually gives my skin that well-needed glow.
Step 5- Serums. Serums are your best friend. I actually get mine from amazon; anything with the bare minimum of retinol and hyaluronic acid is all I need. If you have sensitive skin, try looking for anything that contains niacinamide.
Step 6- Moisturise. For eye creams, look for anything silicone-based like L’Oreal Paris Revitalift Filler eye cream. This really smooths out the under-eye area and makes a world of difference when applying makeup. Then anything non-sticky face creams with little to no fragrance will do. The brand Simple is good for making these kinds of moisturisers- I actually mix my moisturiser with tan boosting serums as I am incredibly pale.
Beyond this, if you’re pale like me, it’s best to start your tan 1 week before your shoot, but repeat your skincare routine on a daily basis.
Next, you’re going to need a few outfits. 5 is usually the optimum number. You can do several, but if you’re anything like me being a 1 woman show and having all of these powerful lights in your face, you get exhausted after 2-3 hours. I’ve done 8-hour shoots before, and I thought I was going to pass out.
I generally look at websites that have decent or good style, fast delivery and always have discounts. You know the kind I mean, Boohoo, PrettyLittleThing, ISawItFirst, MissGuided, NastyGal and so on. In my recent mini-shoot, as of writing this, I found PrettyLittleThing to be the best. They had the best outfits for a really good price, and they were all actually decent quality. Not that the quality matters too much; no one going to tell in a photo. Another big tip for a photoshoot- the quality of your outfits doesn’t matter, as long as they look good on you and in the photo.
I tend to buy outfits I’ll most likely only wear once or on rare occasions, so in this case, discounted sites are the way to go. One massive tip I suggest is to have accessories on hand and get friendly with editing apps so you can reuse the same clothes but change the style and colours through an extra belt, jewellery and editing apps. You can rent fashionable clothes as well, there are plenty of websites where you can subscribe and get clothes on a regular basis that you eventually send back, so they don’t sit in your closet for all of eternity.
The Day of The Shoot
It’s the day of the shoot! First things first is to complete your skincare routine as early as possible. Next is your hair, decide how you want your hair to look with your first outfit. My suggestion is to have your hair down to don’t crease or go frizzy for the next outfit. If your hair is naturally straight- keep it straight. If it’s naturally curly, keep it curly. You can change it up later.
Since your skin should be looking good or better, apply makeup only wear needed. I tend to first go in with a liquid glow on areas I want to look dewy- this includes collarbone and tips of shoulders, then conceal around my eyes and on any redness, I may have. Apply powder on places I don’t want to shine, add bronzer, blush, then some eye shadow and fill in my brows. Less is more.
A vital tip to save you time- always start with the most natural look. You can then build it up, change lip colours, eye colours, add more highlight/contour if needed, even powdered foundation to build up coverage as you go if needed.
Now you’re dressed and ready!

Find a place to hang your backdrop, bring in any props if necessary, set up your lighting, tripod and remote shutter, and you’re good to go! 1 big tip is I always check how the lighting sits on me and check all angles I can work with- get creative on where you can hide your remote shutter. If I’m standing up, I would use my foot to operate the shutter.
When editing the photos after, I go through photoshop express on my phone, make sure my phone hasn’t changed my faces shape- which can happen and if it does, I just put it back to normal. I brighten my eyes, add light and dark anywhere that’s needed, blur any creases in the backdrop, change any colours in the photo to match my brand or the look I’m going for. Then send it to the Lensa app. It’s an amazing app to brighten any dark image if the set wasn’t well lit, you can separate the background from yourself and edit the two separately and even accentuate some details and colours. Lastly, I send all photos through the app Lightleap, this is where I apply a filter but keep it soft and minimal just to allow all the colours to blend well- I don’t want to change the entire image with a filter, it would look highly unprofessional.
And you’re done! You now have a set of almost convincingly professional photos prepped and ready for your business, social media or whatever you plan to use them for.
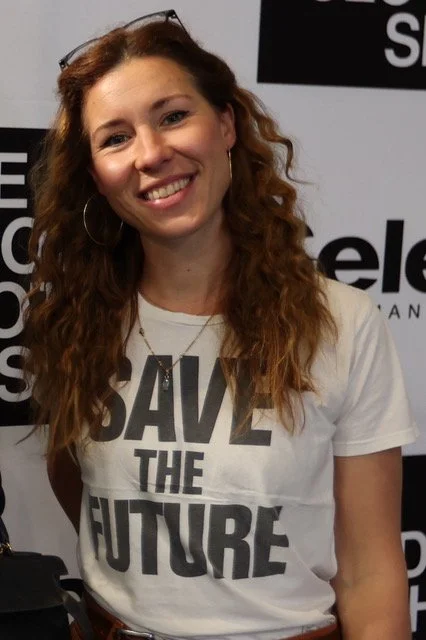
Written By Lauren D’Ath, Social Media Coach, AKA The Beauty Strategist.

Written by Lauren D’Ath
Lauren is a Social Media Coach, AKA The Beauty Strategist.

Recipes