How to Fix Common Diamond Painting Issues Before Finishing
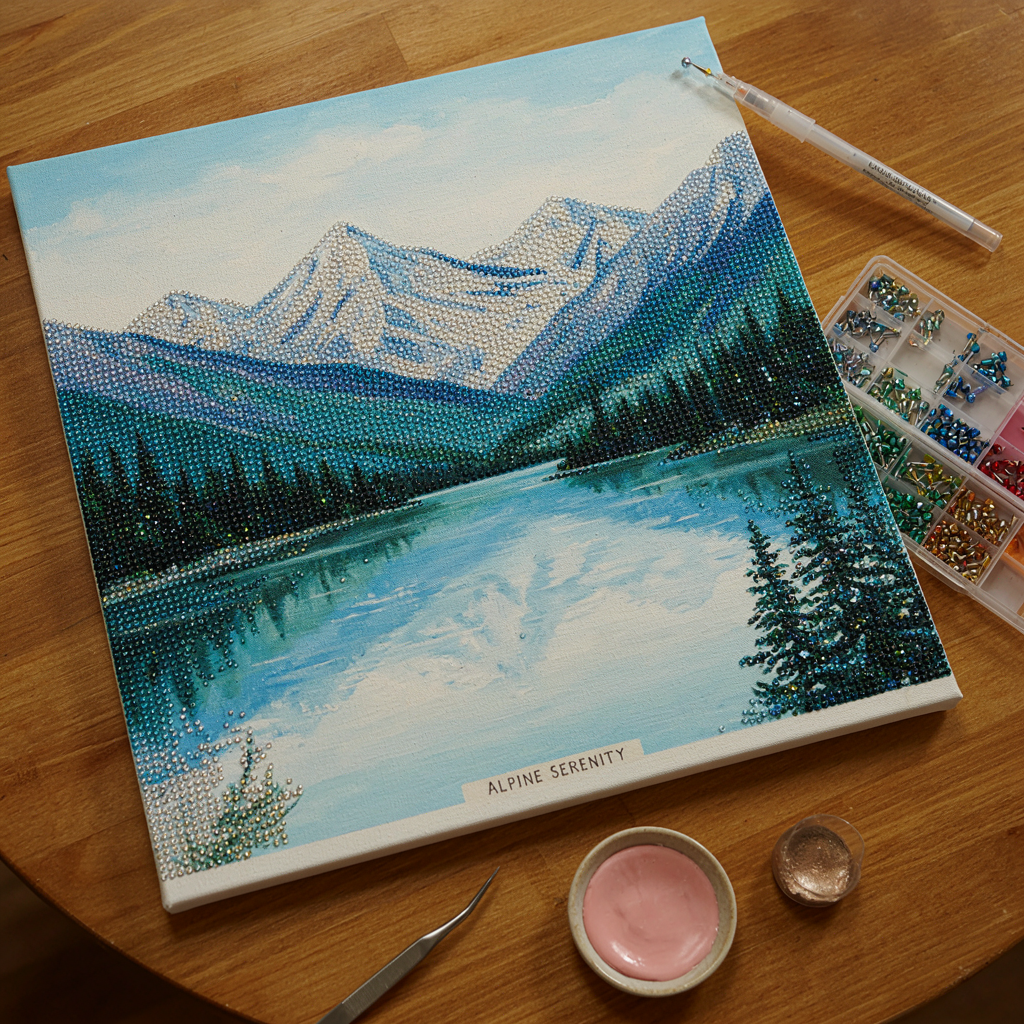
Diamond painting is a relaxing craft that involves placing tiny coloured resin drills onto an adhesive canvas to create a sparkling mosaic-style artwork, but even the most careful crafters can run into problems before the final seal. Diamond painting is deeply satisfying, right up until you spot a gap, a bubble, or a rogue drill sitting at the wrong angle an hour before you planned to seal the whole thing. Most problems are fixable. The catch is catching them before the sealant goes on, because once that dries, your options shrink fast. I’ve learned that the excitement of reaching the finishing stage can sometimes make you rush that final check. On one piece, I was so focused on getting the sealant ready that I nearly missed a few drills sitting slightly unevenly near the edge — a small issue that would have been much harder to fix afterwards.
If you're dealing with drills that won't lie flat, a canvas that's started to wrinkle, or a colour mix-up somewhere in section four, there are straightforward ways to sort things out. This article walks you through how to fix common diamond painting issues before finishing, covering the most frequent problems in order of how disruptive they are to correct. Work through these checks methodically before you reach for the sealant, and you'll end up with a finished piece that holds together properly.
Gaps, Misaligned Drills, and Coverage Problems
Gaps are probably the most common issue people spot at the last minute. They're also among the easiest to fix. Figured Art covers the full range of kits and drill types used across different designs, which matters because round drills and square drills behave very differently when a gap appears. Square drills are unforgiving. The whole grid effect depends on tight alignment, and a missing square drill disrupts that instantly. Round drills carry a little more visual forgiveness built into their shape. Either way, filling a gap before finishing is straightforward as long as you've got the right colour drill to hand.
There’s always that moment when you step back from a nearly finished canvas and suddenly notice one empty space that somehow escaped your attention for hours. I’ve found these tiny gaps are much easier to spot when I stop looking at the artwork as a whole and check each section row by row instead.
The real headache is when people leave gaps unchecked and then seal over them, trapping empty space under the coating. Don't do it. At that point, your only fix involves physically removing the seal in that area, tedious work that risks damaging every drill around the problem spot. Check the whole canvas in good light before you commit to sealing anything.
How to Fill Gaps Without Disrupting the Surrounding Grid
The safest method: use your stylus tip with a small amount of fresh wax, pick up the replacement drill, and press it straight down into the gap from directly above. Never slide the drill in from the side. Sliding puts lateral pressure on neighbouring drills and can knock adjacent ones out of alignment, which means you've fixed one gap and opened up two more in the process. Press firmly but not hard; you want the drill to bond with the adhesive canvas beneath, not crush into it. Once placed, run the flat edge of your applicator (or even a credit card) gently across that section, which spreads the pressure evenly and helps the new drill sit flush with those around it.
Check alignment by looking along the row at a low angle. A torch held to the side of the canvas will highlight any drills sitting proud or tilted, making them far easier to spot than under direct overhead light.
Correcting Drills That Won't Sit Flat
A drill that keeps tilting or popping slightly above the surface usually signals that the adhesive beneath has dried out, picked up dust, or been touched too many times. Test it first. Press lightly on that spot with a clean cotton bud, if it feels tacky, the drill should hold fine. If it feels powdery or slick, you'll need a tiny dot of glue applied with a toothpick, not squeezed straight from the bottle, because too much glue spreads under surrounding drills and lifts them. Place the drill, press for ten seconds, then leave it undisturbed for at least twenty minutes.
And don't go back and prod it every five minutes to check. Repeated touching prevents a proper bond. A small bead of wax pressed gently around the base of a stubborn drill can also help hold it temporarily while the glue cures underneath.
Canvas Wrinkling and Adhesive Failures
A wrinkled or bubbled canvas is frustrating, but it's not a disaster. It usually happens because the canvas was stored rolled for too long, or because one area got damp during the project. The fix depends on severity. Minor waves and soft ripples across a half-finished section can often be flattened before you continue placing drills, so the finished surface sits flat. Severe creases that have set into the canvas are harder to remove completely, though you can reduce them enough that they won't be visible once the piece is framed.
Canvas issues are one of those problems that look much worse at first glance than they usually are. I remember seeing a slight ripple appear on a project and assuming I’d ruined the whole thing, only to find that a little patience and careful flattening solved the problem. It’s a good reminder not to panic and start pulling drills off before checking how serious the issue actually is.
Here's the thing: rushing the flattening process causes new problems, particularly if you apply too much heat to an area that still has drills on it. Heat warps drills and softens the adhesive unevenly, so work only on sections that are either bare canvas or lightly drilled.
Flattening a Wrinkled Canvas Before You Seal
For bare or lightly drilled areas, place the canvas face-up on a flat surface and lay a clean, heavy book on top. Leave it for twenty-four hours. If the wrinkle's more stubborn, place a thin cloth over the back of the canvas and apply a warm (not hot) iron for five to ten seconds per section, never on the drill side. Check between each pass and stop as soon as the canvas feels flat.
For already-drilled sections, the book method is safer. Stack two or three heavy books, leave the canvas overnight, and check in the morning. Most soft waves disappear with this approach. If a bubble persists under a drilled section, try lifting the surrounding drills one by one with a blunt tool, smoothing the canvas beneath, and replacing them. It's fiddly, but far better than sealing over a lumpy surface; proper flatness matters most if you plan to frame the piece.
Re-Sticking Drills After Adhesive Failure
Adhesive failure across a whole section, rather than one or two individual drills, is usually caused by moisture exposure or handling the canvas face-down on a rough surface. That entire adhesive layer feels less sticky. Your best approach is to work in small patches: press a fresh piece of removable tape across the affected area, then peel it up slowly. This lifts dust and debris sitting on the adhesive, often restoring enough tack for drills to hold again.
If the adhesive is genuinely gone, use a repositionable spray adhesive on the bare canvas and wait for it to become tacky, usually two to three minutes. Work in sections of about five square centimetres at a time; larger areas tend to shift before you finish placing drills. Always check the rest of the canvas for similar patches before you start sealing. Skip that step, and you'll be opening the sealant over a section that's already on its way out.
Colour Mix-Ups and Missing Drills
Colour errors happen. You place three rows in the wrong shade without noticing, or a bag tips and mixes two similar colours together. Fixing these is straightforward if you catch them early, time-consuming if they've been in place a while. So do a full colour check before anything else. Hold the canvas at arm's length and look for any area where the shading feels slightly off. Your eye will often catch a problem before your brain registers exactly what it is. Trust that instinct. A misplaced section of colour reads as "something wrong here" even in peripheral vision.
Sorting Wrong Colours Before You Seal
Removing wrongly placed drills is simple with a dental pick or the fine end of a stylus. Slide the tip under one edge of the drill at a shallow angle and lever it up gently. Stabbing straight down damages the adhesive surface, making replacement drills far harder to fix properly, so don't. Remove all the incorrect drills first, return them to their labelled bag for reuse, then work through the correct colour systematically. Take your time on the first few to confirm you have the right replacement shade in good light, because so many colour errors come down to similar DMC codes read under poor lighting, so move to a bright window or a daylight lamp before placing the corrected drills.
Once done, run your finger lightly across the repaired section to make sure nothing sits proud before you move on to sealing.
Running Out of a Specific Drill Colour
Running short of one colour before the canvas is complete is a solvable problem, but you do need to act before you seal. Check your remaining stock. Count the empty cells that need that colour, but don't panic if the number looks large, because many suppliers can match DMC codes and send replacements directly. The code is printed on the colour reference sheet included with most kits. Contact the kit supplier with that code and the kit name, leave those cells empty, and keep working on adjacent sections while you wait. Partial coverage creates a messier repair job than clean empty cells that simply wait for the correct colour. Never substitute a visually "close" colour; the difference becomes obvious once the sealant flattens the surface sheen.
Conclusion
Sorting out how to fix common diamond painting issues before finishing comes down to one habit: check the whole canvas carefully before you seal it. Gaps, misaligned drills, colour errors, canvas wrinkles, all fixable at this stage with simple tools and a bit of patience. Seal early, and you lock problems in permanently. The twenty minutes spent on a thorough pre-seal inspection protects all the hours you've already put in, so work in good light, trust your eye, and tackle each issue one section at a time. The finished result is well worth it.
Written by Julia Havens at Figured Art.



Recipes